***** Please Don't Forget To Visit My Web Comic *****

BugPudding Webcomic

Additionally, You Can Help Support Cartooning in ToonBoom By Making A $5 donation.

Tuesday, April 24, 2007

Jump Into Animation - Part 2

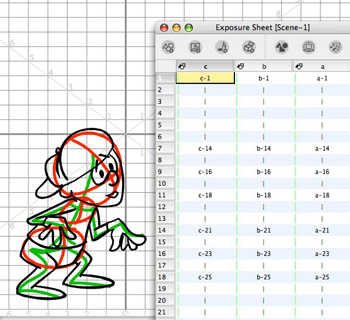
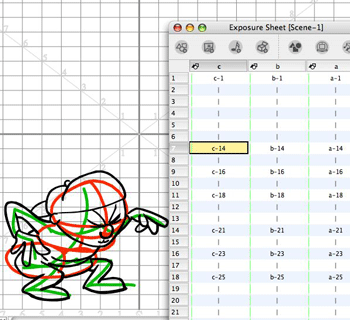
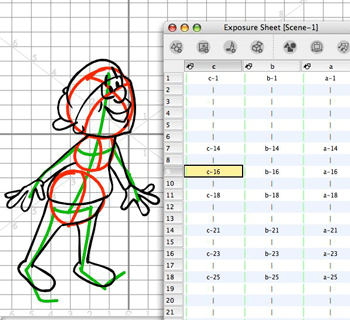
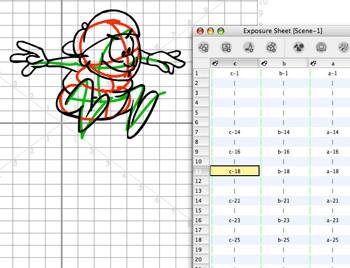
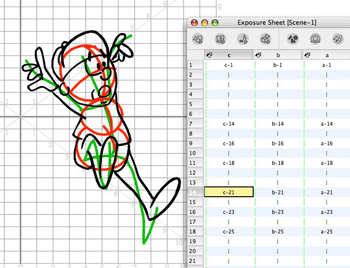
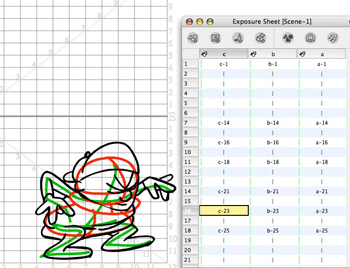
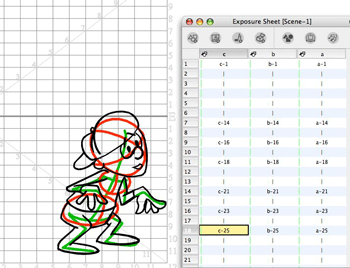
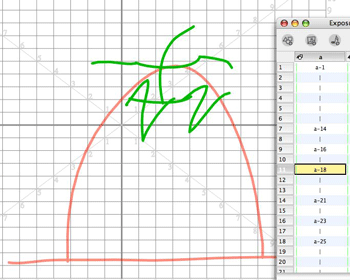
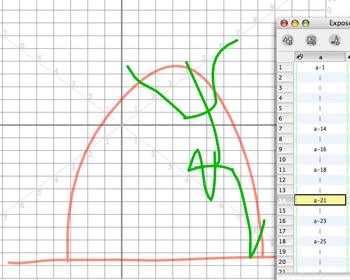
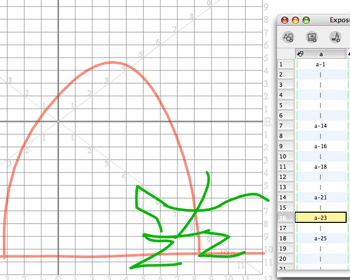
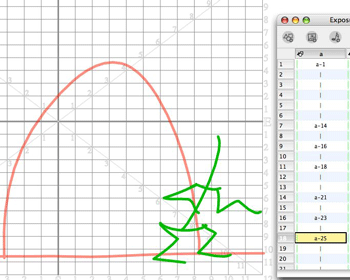
I set up a new animation project in Part 1. Then created a drawing element called "arc" and made a visual guide to follow while drawing this jumping action. Then I created another drawing element and roughed in the jump using a simple stick figure. Finally I created another drawing element and drew some solid volumes to act as a foundation for the character. So now I am creating another drawing element named "c" and I can actually start drawing a character using my rough guides.


You might notice that my three drawing elements "a", "b", and "c" all have their cells visually identical, again this is not a rule, just a habit of mine. Animation projects are hard enough work, so with experience you will find your own little tricks to make your life easier.


These are not meant to be finished inked drawings and if this were a real cartoon I would probably have done this layer in blue and created a clean up and inking layer called "d". One thing that I often find when working with people doing computer animation directly in digital (not scanned) is that they almost always want to rush to the painting phase while animating. I call it the rush to the finish line. Again, different methods exist and there are no rules set in concrete, but "filling" in paint zones before the animation is totally worked out and satisfactory, just makes your life harder. Seeing a more finished looking character may be gratifying but it is best to wait on the painting.


Also as temping as it might be to really want to polish your drawings, you want to work out the action first and then you can polish away on a new layer. In fact, when you are first starting out, it is much more important to do a lot of "rough" animations instead of only doing a few really finished pieces. It is tough to resist the urge to polish and detail your exercises but you will progress faster if you draw more. There will be plenty of time to polish later.


As you get to the stages where your construction elements are no longer needed, don't delete them just un-check them in the X-sheet and in the timeline. You might want to reuse them at some later time during your project and they really don't impact much except taking up some hard drive space. They won't show in or add to the size of your rendered work.


I hope that this tutorial is easy to follow, but if you have questions be sure to ask for clarification.


We are almost finished and this is only about a second of screen time and not inbetweened. Now you know why limited animation replaced full animation on TV in the 1960's.


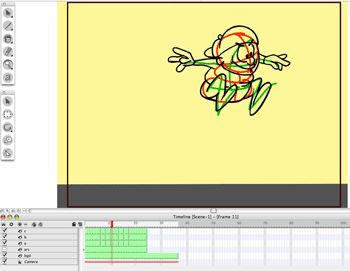
Here is a Camera and Timeline view of our little jumper. You will notice that we aren't spending much time on the camera or the timeline here because this is a character action and we aren't worrying about compositing it into a scene yet. Also because this isn't cutout animation I don't need keyframed parameters at this stage.


You can see the animation of the character added to the construction here.

That's all for now.

Labels:

Jumping Into Animation - Part 1

In our last tutorial we animated a stick figure throwing a ball. It introduced us to using TBS for making a simple animation and we learned to use "onion skinning" and to make "in between" drawings. If you missed it then please check out "A Good Place To Start - Part 1".

We are going to do a slightly more involved animation this time. We will be doing a "jumping" action. It basically has three sections. We start out with an "antic" (an anticipation) followed by the jump itself and we "settle" out at the end. For simplicity sake I won't be doing any in between drawings so this will be a "rough" exercise but instructive none the less.

We will start a new animation project in TBS and create our first drawing element on the scene one exposure sheet. I am renaming this element "arc" because it will be used as a visual aid in my work. One important tip when animating is that you can and will create many elements (layers) which you will use for "scratch" or "rough" work and then hide them later.

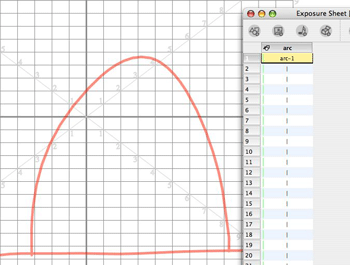
So on cell 1 of frame 1 of "arc" I drew a ground line and an arc in red. (the color choice is not important, in fact I chose a red that is partially transparent) Remember this element is to be used as a guide in roughing out the jump and then it will be hidden and not needed. My jump will span about 25 frames at 24 frames per second, so I extend the exposure of cell 1 of element "arc" out to frame 25. That way the arc is visible while I'm roughing in the action.


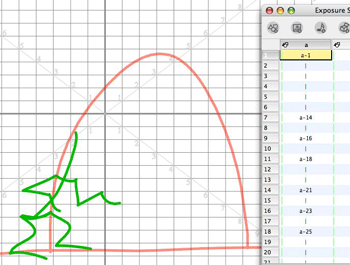
Now I will create a second element in my exposure sheet and rename it "a". I typically name my elements single letters and use element notes to add more descriptive information about the element. It saves space which is always a good thing. I am drawing with the pencil tool and a pen set to a Max of 5 pixels. I have switched to green as my drawing color. Be sure to turn on your Auto-Light table (shortcut L) so that the arc is visible from below. And there is our old friend the stick figure in pose one.

You may notice that element "a" already has a spread out sequence of cells showing. That's because I have a habit of pre-populating a new element with cells before I draw. Certainly not a requirement, but rather a habit. What I do is start at frame 1 and insert a large enough number of cells to handle what I'm planning to draw. Typically I start with 100 cells. This gives me a sequentially numbered set of cells for that element. I like to match cell numbers to frame numbers. The unused numbers are just stored in the scene folder and are always available to use if I want to add in between drawings. I don't like random cell numbers. Animation is a detail oriented and organized art. You will also notice that I have spaced the cells based on my desired timing of poses for the jump. How did I determine that spacing? Click here to learn more about animation timing .


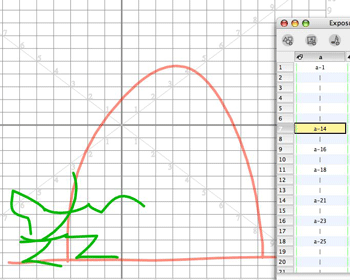
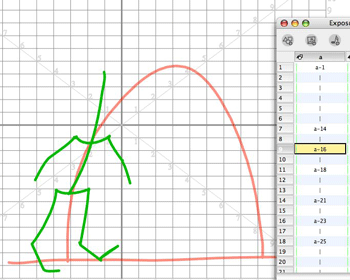
Pose 2 is our "antic" pose for the jump. The main purpose of an "antic" is to create an anticipation of a coming action. It helps to alert the viewer that something is about to happen. Also if you try jumping, you will notice that you squat down or flex downward before you push upward.


OK, so now in pose 3 our jumper is beginning to unleash some of that energy stored up when he flexed his knees. Notice that we will use the red arc as a visual guide to follow. Remember in our throwing tutorial we talked about the importance of arcs in non-mechanical motions.


Pose 4 is the top of the jumper's arc. For all you fans of the bouncing ball exercises, you might recognize the squash and stretch aspects and similarity in a character jumping.


Pose 5 has him starting to come back to the ground.


Pose 6 is the squash of his weight impacting the ground.


And pose 7 is the "settle" part of the jump as the character relaxes after landing.


So now we have a rough jumping action. View it here.

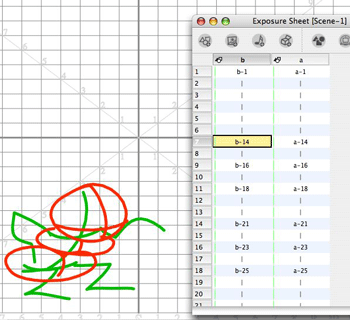
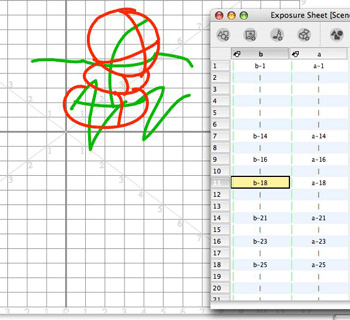
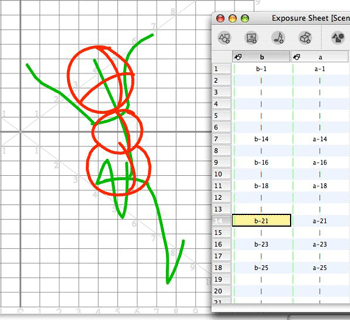
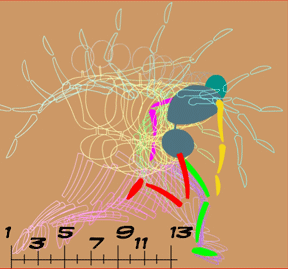
Next we will add another element to our Exposure sheet and rename it "b". This element will be for some construction volumes to help us better draw the character solidly. These volumes are like circles or ovals but you want to add contours to them and visualize them as 3D solids.


I'm not showing every frame here, just the most significant ones.


I am drawing in orange just to make things really visible. Both elements "a" and "b" are strictly for construction purposes and in Part 2 we will be drawing the actual character on layer "c" using them as visual guides.


View the jump with the volumes added here.

We will continue in Part 2.

Labels:

Sunday, April 22, 2007

It's Elemental - Part 2

It is suggested that you read Part 1 before proceeding if you haven't read it previously.

This is a continuation of a series aimed at exploring some of the fundamental concepts behind how Toon Boom Studio is organized. From my experience helping many people to use TBS, I have learned that understanding the metaphor behind the environment and how that metaphor evolved from traditional 2D hand drawn and photographed animation really helps in the learning process.

The basic development environment of Toon Boom is structured around a hierarchy of computer files grouped together in an “animation project”. Even that metaphor is evolved from traditional animation. In the making of cartoons traditionally, there are many documents and artwork assets that have to be very well organized and able to travel through the production workflow in scene folders etc. So the TBS evolution of organizing and containing our cartoon making materials is the TBS animation project. Every cell is a file and those files are stored in folders by element type and separated into scene folders
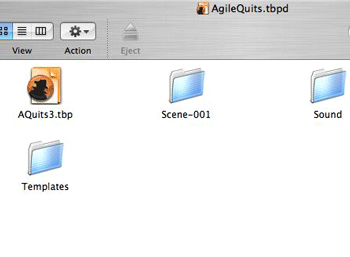

Inside a TBS animation project folder
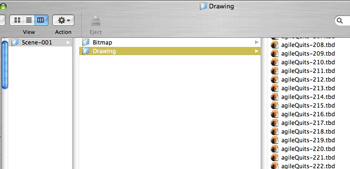


Inside a scene folder

TBS animation projects have timelines and exposure sheets, one of each attached to each scene. Traditional 2D photographed animation just uses exposure sheets. Each scene’s timeline and exposure sheet in TBS are fully integrated and work together. A TBS exposure sheet, like a traditional one, has rows and columns. The rows are representational of frames also referred to as exposures. (This is traditional animation terminology relating to a frame of film which is also a photographic exposure.) The columns are representational of elements which are the TBS equivalent of layers stacked under a photographic animation camera on a rostrum stand. ( review Part 1) The TBS timeline has rows and columns. The rows are representational of elements ( the layers) and the columns are representational of frames ( film exposures). The rows of the timeline are often referred to as “tracks”.

Timeline layering in TBS is from the top down as listed vertically. So elements at the top of the timeline are closer to the viewer and elements at the bottom of the timeline are farther away from the viewer. Layering in the exposure sheet is from the reader’s left to right. (This is a change from earlier versions of TBS which were ordered from right to left). So elements on the exposure sheet which are on the reader’s left are closer to the camera then columns (elements) to the right.
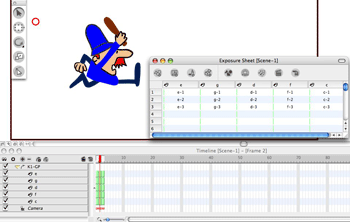


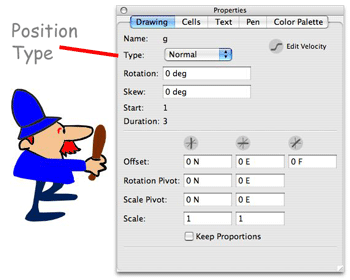
One interesting difference in TBS is that you can designate a “positioning” type for an element that will establish it as a “foreground” or “background” element or just a “normal” element. (Elements are “normal” by default.) Foreground elements are automatically seen in front of other elements and background elements are automatically behind other elements, although there can still be hierarchical layering in the foreground “group” of elements and in the background “group” of elements. Again this hierarchy is based on each group member element’s relative position with respect to other member elements of the same “positioning” type in the timeline and the exposure sheet. So some foreground elements can be positioned to display in front of other foreground elements and the same for background elements overlapping other background elements. Normal elements fall in between foreground elements and background elements for viewing.


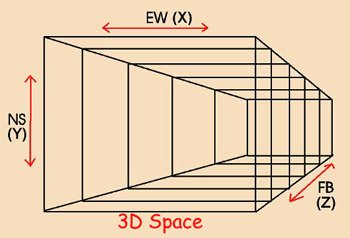
(The use of virtual 3D space is also important to understand, but we will get to that later.)

The Exposure Sheet and the Timeline

The exposure sheet in TBS evolved from the exposure sheet used in photographed animation which is also often referred to as a “dope” sheet. (To “dope” something out is a slang expression for communicating and organizing information) There are many similarities between the TBS exposure sheet and it ancestor. Traditionally the exposure sheet moved from step to step throughout the animation production workflow as an organizational, instructional and coordination and control document. It started its life with the director and worked its way through the process to the camera person and the post production editor etc. So the traditional exposure sheet was really the heart of the animation workflow in terms of facilitating collaborative exchanges and directions. I won’t elaborate on all the traditional uses of the exposure sheet (X-sheet) but I will discuss some of them here. Why? Because the timeline that evolved in 2d animation software like TBS was created to handle some of the prior aspects of the exposure sheet. Many people wonder why does TBS have both an exposure sheet and a timeline and before you finish reading this article you will know the answer.

Click here to view a example of a traditional Exposure Sheet

Here is a partial list of functions that were carried out through the traditional x-sheet:

Establish the flow and timing of the entire cartoon

Sound track breakdown by frame

Direct the creation of the actual animation

Order of cell layers from top to bottom by frame

Cell usage and exposure by layer by frame

Thumb nail sketches, notes, and ideas for actions by frame

Camera field size and movement instruction by frame

Transition effects by frame

Pantograph instructions and registration peg bar movements by frame

Now let’s take each of the functions on the list and see how this important function is implemented in TBS either through the exposure sheet or the timeline.

Establish the flow and timing of the entire cartoon

In traditional cartoon making after the story has been conceived, dialog written and storyboards and layouts have been made, the cartoon’s director would break the production work into scenes or parts of scenes and folders would be prepared to organize the assets to travel through the workflow. The director would make conceptual pose drawings and key drawing and also would make notes and establish the scene timing on exposure sheets for each folder. Thus the X-sheets became a major part of the “blueprints” for constructing the cartoon.
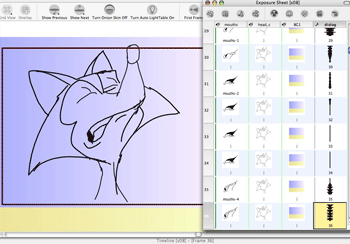


Sound track breakdown by frame

After the sound track, particularly the dialog had been recorded and before any animation began, the scene folders containing the X-sheets would move to track reading where very skilled individuals would breakdown the sound elements and add this information on to the X-sheets to identify how the sound track would map to the action frame by frame. Often there would be additional directorial notes added after track reading to emphasize important points that the director wanted to be included in the animation related to acting or synchronization.

Order of cell layers from top to bottom by frame

Layers were even more critical in photographed animation because their total number had to be restricted usually to 5 and controlled and accounted for due to optical considerations. Even the thinnest cells although transparent still diffused and altered light and the same shade of a color appears differently depending on how many layers are stacked. So a shade of red on the top layer looks different from that identical shade of red on the second or third or forth layer of the stack. Paint actually had to be mixed to compensate for the layer on which the shade of the color would be used. Fortunately this restriction on total layers and optical diffusion of colors is not an issue in computer rendered animation. So the ordering of layers is just a matter of picture composition today. The exposure sheet in TBS is the starting point for creating and ordering elements. Most composition issues arise in camera view so final layer ordering is usually addressed more in the timeline rather than the exposure sheet, but the initial layering is usually set up in the exposure sheet to accommodate drawing issues. In either case this information and the ability to move layers around is a required and synchronized function in both.

Cell usage and exposure by layer by frame

Cells are uniquely named and identified in the exposure sheet. The value of naming cells so they can be uniquely identified is very important particularly to the human aspects of the TBS user interface. It allows you, the animator, to quickly find and swap or reuse cells. Software that only has a timeline is of no value when it comes to quickly finding and identifying cells. If you ever tried to build a cycle and or reuse previously created cells whether currently in use or not on the timeline it is slow, tedious and painful. But by using uniquely named cells and their thunbnails working in the x-sheet makes this a breeze. TBS has several other aids for cell handling and they are really sweet and they all stem from the unique naming of every cell. We will explore these in future articles. But needless to say it is much easier to work on specific character animation action timing using the exposure sheet VS the time line. The exposure sheet is more oriented to character animation while the timeline is more oriented to composite animation and editing. The big exception here is that puppet manipulation is more timeline oriented because like complex special effects and camera moves puppet animation is based on keyframing parameters. Totally a creation of the computer world so not really an evolution from photographed animation.

Thumb nail sketches, notes, and ideas for actions by frame

Again this is an exposure sheet function; it is easy to tie notes to elements, and to cells within elements down to the frame instance of the usage of a unique cell. Animators typically work in multiple sessions on creating an animation so making notes to remind yourself or someone who is collaborating on the animation with you is really great.

Camera field size and movement instruction by frame, Transition effects by frame, Pantograph instructions and registration peg bar movements by frame

Traditionally the photographing of the animation was a really tedious and labor intensive part of the process. The camera person literally had to do almost everything by hand frame by frame. And every single instruction for how each frame was to be composed and photographed down to the minutest detail had to be recorded and communicated step by step through the workflow. So that by the time the scene was to be filmed there was no room for questions or errors. In computer rendered animation the “camera person” is the computer itself, the render engine. So all those hand written instruction for how to set up and shoot each and every frame which were traditionally detailed on the x-sheet still have to be recorded and communicated to the “camera person” the computer. But you can’t easily type instructions to direct a computer unless you are a computer programming expert so an instruction recording and communicating interface had to evolve from the traditional x-sheet and that frame by frame interface did evolve as the timeline. In future articles we will explore how all this information is recorded and communicated through dynamic elements like pegs. And if you have never seen a pantograph before it is what computer animation refers to as a motion guide.

That’s plenty for this time, more to come later.

Labels: , , , ,

Wednesday, April 18, 2007

A Good Place To Start - Part 2

Be sure to read Part 1 before you read this next part of our tutorial.

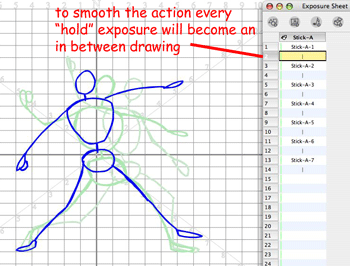
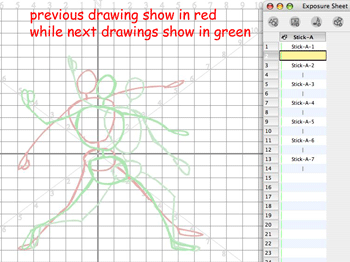
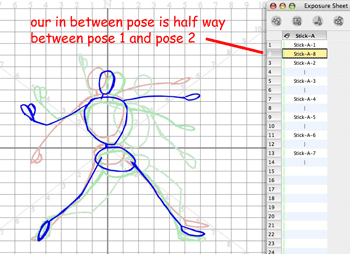
We previously set up a drawing element in TBS, renamed it, and then drew seven "key" poses to make a "stick figure" throwing action. That was animating on 2's and for most actions that would be a good choice. But throwing is a very "fast" action so we might be better served to animate it on 1's. This is an artistic choice not a rule. It is usually easier to animate on 2's or 3's and then to go back and make in between drawings if you feel you need them. We learned in Part 1 to use arcs to describe motion and we used the onion skinning to reference our "previous" drawings. We want to remember and use those arcs for our in between drawings too. And onion skinning is really important when doing "inbetweens" because we need to reference both the "previous" and the "next" drawing so the drawing we are making will fall in the correct place in between those two drawings.


I have a trick I use to change from a held exposure to a new cell for "inbetweening". I use the "cell" tab on the Properties panel. If you highlight the cell you want to replace in the Exposure Sheet and then go to the "cell" tab and move the slider all the way back to your left, you get a blank cell all ready for you to start your next drawing.


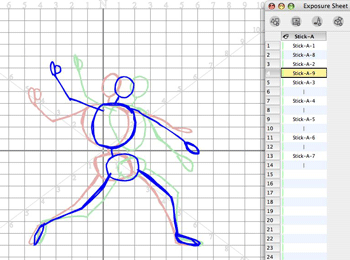
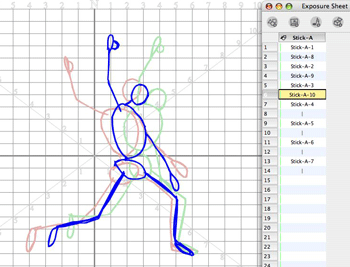
I'm now going to draw my first in between drawing. Because I want to keep this tutorial really simple all of the in between drawings are going to be "spaced" exactly half way between the "key" drawings. If you want to learn more about "spacing" of drawings in animation timing you can read this weblog article.


Notice that TBS onion skinning provides us with different colors for "previous" and "next" drawings and we can have as many as three "previous" and three "next" drawings visible. But as a general rule you probably will only want one "previous" and one "next" drawing visible, otherwise it gets confusing. Now this is a great example for learning to "inbetween" because even though you are spacing the in between drawing half way between the keys, the character is twisting and bending so you have to really follow the arcs carefully.


This is also a great example of the shifting of the character's center of gravity and weight as he throws the ball. And you thought I just chose it because it wasn't a "walk" cycle.


If this is your first animation, you are probably thinking " this is a lot of drawings to make". Animation is fun, but it is a lot more work than drawing a comic book. Not that drawing a comic book isn't a lot of work too. In future articles we will explore ways to reduce the number of drawings and the work, but animation is still time and labor intensive. If you are too lazy to do the work then maybe you should just watch the cartoons and not try to make them.


How many in betweens are there in this animation? Answer 7 "keys" on 2's means 6 "inbetweens" to go to 1's and I'll add a 7th drawing to settle out the action too.


In between drawing may seem like dull stuff, but they have to be placed correctly and you have to study the "previous" and "next" drawings or you can really "kill" the animation.


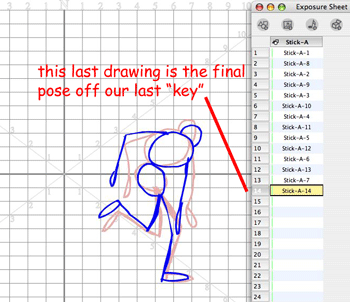
This last drawing is technically not an in between but rather just a final stopping of this action. Some animators refer to it as a "settle" or resting position.


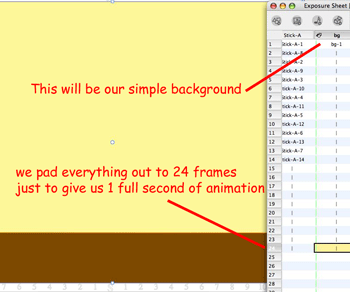
I made a background and added another element to the Exposure Sheet. This is just to make the published animation easy to view on the Internet. And I padded the animation out to a full 24 frames just so it would take 1 second to view before it starts over. This isn't a cartoon, it's a tutorial example.


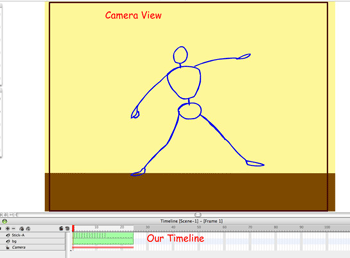
Before you watch this masterpiece, you can switch to Camera View and even look at the Timeline. We didn't spend much discussion about the Timeline in this tutorial because it wasn't important. We will explore the relationship and importance of the Timeline and the Exposure sheet in future articles so "stick" around. (no puns intended)
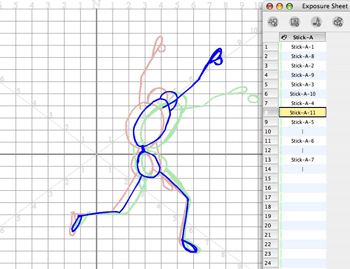
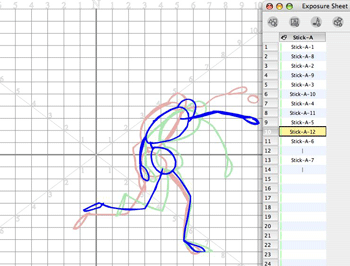


HERE is the finished animation for you to watch and study. I hope that you picked up some knowledge from this tutorial. Comments and questions are always welcomed. Stick Figures are great as a starting place to learn animation. You don't need to be a great cartoonist or artist to draw stick figures and you can make them do anything and have a lot of fun and learn how to animate even if you aren't 9 years old.

Labels:

A Good Place To Start - Part 1

A recent posting on the Toon Boom Studio forums requested tutorial help for a 9 year old interested in getting started in animation. I thought back to when I was a young person and started animating and I remembered making "flip books" full of stick figures doing all sorts of actions. Today with products like Toon Boom Studio and Toon Boom Studio Express learning to animate is really fun and easy.

I decided that this first tutorial should be a good place to start in that learning process. So I'm going to take you through the steps in creating a "stick figure" throwing a ball. I'm going to keep it as simple as possible and break it into two parts just for ease in publication. I certainly hope that you will find it informative even if you are older than 9 years old.

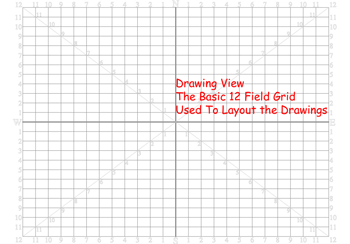
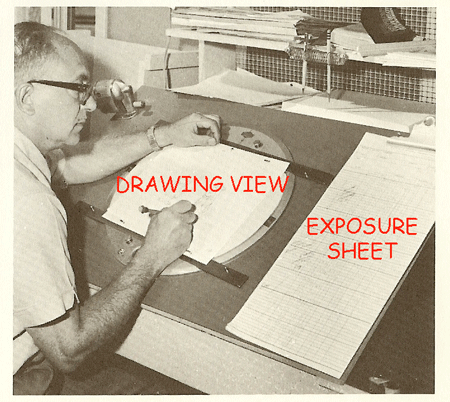
The first step in doing our "stick figure" animation is to open TBS and find the drawing view panel where we will draw our action.


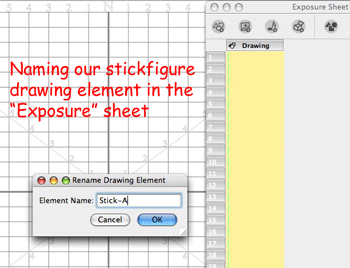
You will also want to open up your Exposure Sheet panel which has a single drawing element by default. We will start by renaming that drawing element.


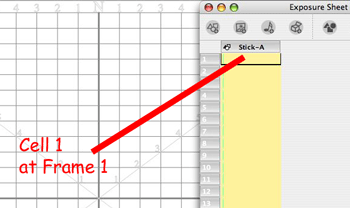
Our first sheet of "digital" paper will be cell 1 at frame 1 under the Stick-A drawing element.


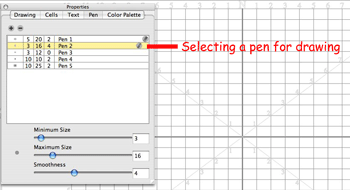
Now that we have a place to start drawing our action, we will need a drawing tool like the pencil or the brush. I normally use the brush for rough animation. We need to open the Properties panel and choose a "pen" for our drawing tool. I have set up and chosen a variable pen 3 minimum and 16 maximum and smoothing set to level 4. (strictly a personal preference) You can't take advantage of pressure sensitivity unless you are using a drawing tablet like a Wacom tablet.


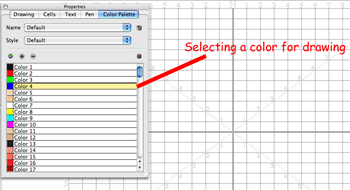
We also need to choose a color for our "stick figure" drawing, so I chose "blue". (again just a personal preference for rough sketches)


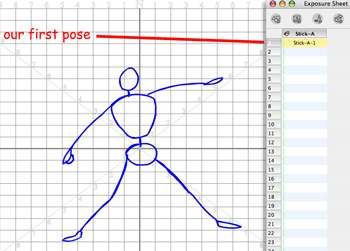
Now that we have chosen a pen and a color, we can start drawing. So I have drawn the first pose of our "stick figure" starting to throw a ball.


Be sure to save your project work often to avoid the possibility of losing it to the mysterious world of computer goblins. I saved my project to a file called "Stick", which is very original and took lots of thought. Not really. Next we want to advance to the second frame in our Exposure Sheet and extend the exposure of our first cell to include frame 2. We will do this for each drawing we make in this first pass. This is called animating on 2's where each drawing is held for 2 frames. As a side note I have the animation project set up for 24 frames per second as the frame rate. Refer to this weblog article to learn more about animation timing and frame rates.

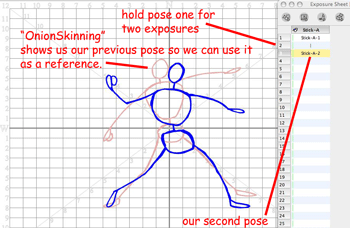
Now we want to move to frame 3 to draw our second "key" drawing in this throwing action. I have turned on onion skinning so that I can see the previous drawing and use that as a guide for this next "key" drawing. Onion skinning is like using a light box as a drawing board so you can see the drawing underneath your current drawing. If you have never seen or used a light box, then hold two sheets of drawing paper up to a lamp and you will get the idea of how us old timers use light boxes.


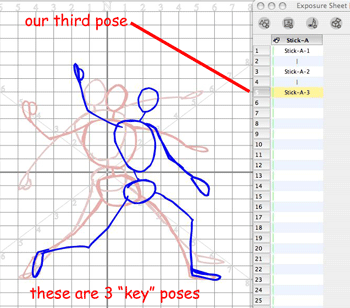
After completing pose two, we extend its exposure an additional frame and move on to frame 5 to draw our third "key" pose. For the most part this is called working "straight ahead" but in Part 2 of the tutorial we will remove the second exposures and add in between drawings to improve the smoothness of our throwing motion. So we will end up animating on 1's instead of 2's, but that is for the next part of the tutorial.


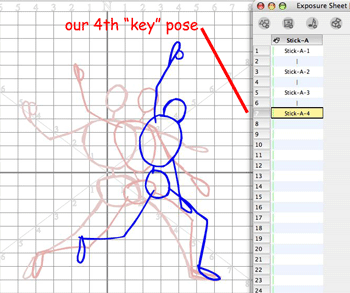
By now you should be seeing a pattern in our work flow. We draw a pose then extend its exposure for a second frame then move to the next frame and using the onion skinning we reference the previous drawing to make the next pose. One interesting thing to note about most non-mechanical motions is that things travel in arcs. So as you look at the various poses in sequence try to see if you can find the many arcs I'm using. Here's a tip. Pick almost any body part and follow that specific part from pose to pose. It will be following an arc path.


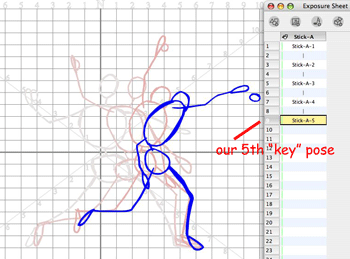
We are making good progress as this next drawing is our 5th "key" pose. You don't need to be a great artist to animate. Sure the more you draw the better your skills will evolve, but stick figures are fun and easy to animate and are the basis of animating almost any cartoon character. You just need to add some flesh and muscles to those "sticks".


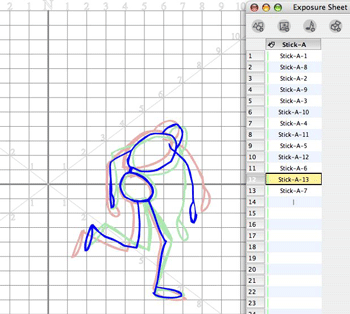
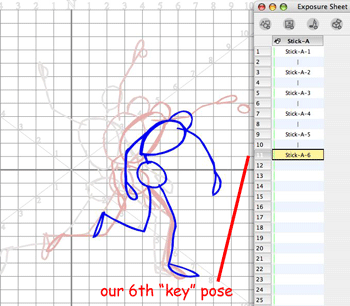
We are almost through doing our "key" pose drawings for this throwing action. Here is "key" pose number 6.


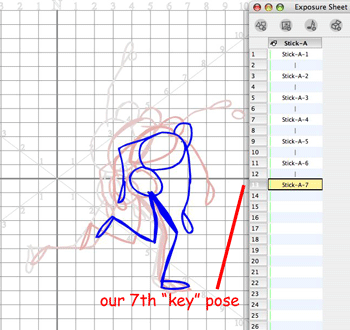
And finally here is the 7th and final "key" pose. If you want you can stop right here and have a pretty nice first animated throwing action.


In Part 2 we will go back and add in between drawings to give this action a more fluid look.

Labels:

Sunday, April 15, 2007

It’s Elemental – Part 1

All animation is created by rendering a series of pictures in a sequence and displaying those pictures at a sufficient rate of speed so as to generate the phenomena called “persistence of vision”. One of a cartoon animator’s goals is to optically blend sequential images together to create the visual effect of continuous motion.


Pictures are composed of multiple picture elements

The individual pictures themselves can consist of a single visual element or a combination of many visual elements. In most animations, the pictures in the sequence, also referred to as the frames in the sequence, are constructed as compositions of many layered picture elements.


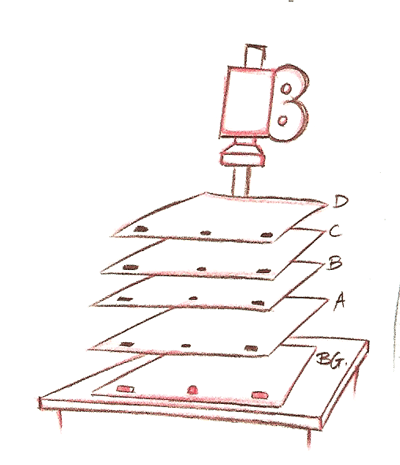
Traditionally, these picture elements are arranged in an overlapping layered stack lying flat under a photographic camera.


Each picture element traditionally was created individually on a clear transparent plastic sheet called a cell. The stacking order of the cells creates the visual effect of depth by allowing some picture elements to overlap other picture elements producing perspective in a 2D picture. In order to position each picture element’s cell relative to the other elements of that composite picture, there is the need for some means of element registration. And so each cell was pre-punched with several holes that could be aligned on a registration peg bar.

It is totally logical therefore that 2D software applications like Flash or Toon Boom Studio use the concept of “layers” to compose frames. Layers are just a way of describing a stacking or overlapping order. In Toon Boom layers are called elements. (more about the different kinds of element types later)

Going from the physical world to the virtual world

So as we make the transition from the physical world of hand drawn and photographed animation to the Toon Boom Studio virtual world of computer rendered animation, we need to carry forward virtual versions of many of the same tools that were used to produce photographic animations. In Toon Boom Studio, our picture elements or cells become our drawing elements or image elements, etc. as represented by the columns in the TBS exposure sheet.


By the way, the TBS exposure sheet itself is a virtual evolution of a similar picture organizational document used in traditional animation. Each element (layer) on the exposure sheet represents a specific level in the composite stacking order of each frame. And the individual picture elements that are contained in each individual exposure sheet element are in fact called cells. So reading across horizontally in the exposure sheet, we can view the stack of cells that makes up a single frame, and their relative positions correspond to their overlapping from the top to the bottom of the composite stack of cells. The top of the stack is to the reader’s far left and the bottom of the stack is to the reader’s far right in the TBS exposure sheet.

Planning layouts with field guides

With the TBS exposure sheet, we can describe which cells belong to which elements and we can show how those elements will be ordered in the composite stack for each frame. What about the relative positioning of elements in a frame? One way which evolved from traditional hand drawn animation production for determining relative positioning of picture elements in a frame is a device call a field guide or field grid.


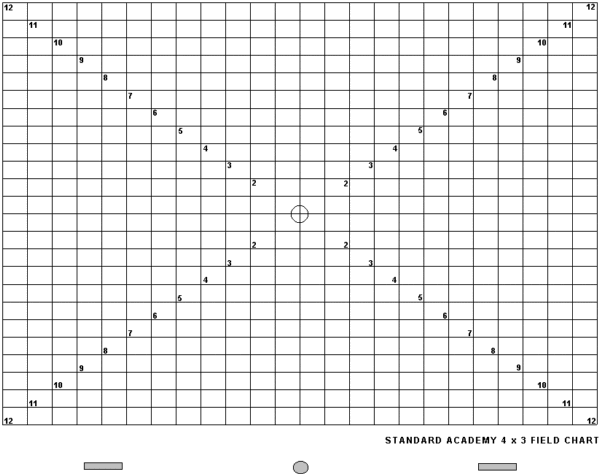
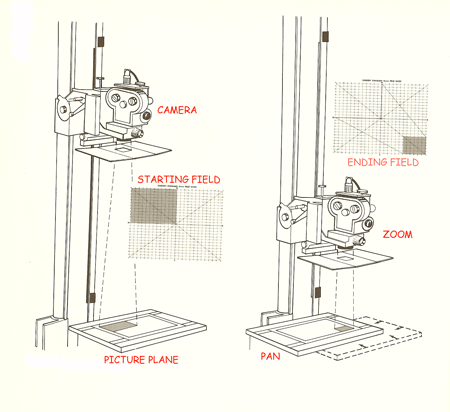
Traditionally this field guide is a transparent sheet printed with a series of concentric rectangles displayed at increments of one-inch in width conforming to the standard 4:3 screen aspect ratio. Also indicated on this grid are the four horizontal plane directional reference points; North, South East and West. The function of the field guide is to provide a standard coordinate system so as to specify the area that the camera will be set up to render. It is also a vital aid to the animator in laying out a scene, working out the final composition of shots and in specifying any camera moves. In TBS the use of a simulated field guide means that if you have your hand drawn art scanned into the computer you will always be able to line up your artwork in Drawing View exactly the same way as you designed it on your drawing board. Essentially in animation, the viewable area under the camera can be expressed in terms of fields of view based on the optical distance from the camera to the art work. The closer the camera is positioned to the art work the smaller its field of view. Of course in the virtual world of TBS, we have no real way to create optical distance, so we can simulate it by scaling the size of our art work. The closer to the camera the larger we scale up our art work and the farther from the camera the smaller we scale down our art work. Scaling is therefore used to create the illusion of optical distance.
That’s all for this installment, more next time in It's Elemental - Part 2

Labels: , , , , , ,