***** Please Don't Forget To Visit My Web Comic *****

BugPudding Webcomic

Additionally, You Can Help Support Cartooning in ToonBoom By Making A $5 donation.

Sunday, September 16, 2007

Introduction to Photo Cut-Out Animation Part 3

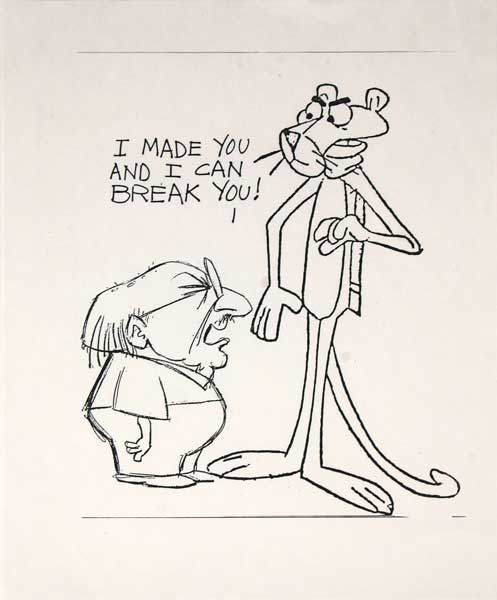
In part 1 and part 2 of this series on photo cut-out animation; I used the graphic of a caricature of Friz Freleng and the Pink Panther to demonstrate how to convert a single graphic into a fun animation. In part 3, I’m going to try to demonstrate even more cartooning that you can do with the new "Import and Vectorize with Texture" feature of Toon Boom Studio V4.0.

Animation is usually thought of as drawing intensive. The advent of animation software like TBS has certainly brought the joy of creating animation to everyone, but it can’t do much to solve the lack of drawing skills that so many people would like to overcome. Certainly cut-out animation is a great way to reduce the need for so many drawings, but there still needs to be some initial drawing of the character to create the cut-out puppet. Photo cut-out animation has always been possible but was not as easy and required significant preparation work outside of TBS to create the characters themselves. Now with version 4.0, photo cut-out animation is much easier to implement and can be done almost entirely inside TBS. Perhaps the most famous and successful form of true photo cut-out animation are the cartoons from JibJab. So I am going to try to demonstrate how you can creatively put together a JibJab style cartoon without any real drawing being involved. It is a fun cartooning style for anyone to master without regard to your draftsmanship abilities.

With Halloween being an upcoming holiday, it seems appropriate to use that as a creative theme for this cartoon example. I wanted to make it a musical like most of the JibJab cartoons, so I chose Bobby Pickett’s famous song “Monster Mash”. In this tutorial I am only using a small snippet from the beginning of the song so that I can keep things simplified.

I took just that short sound snippet and imported it into a TBS sound element at 24 FPS. I could have used the TBS lip sync feature to breakdown the mouth movements, but I chose to do it manually. So my first step was to do some old fashion “track reading” to produce a bar chart of when each word is spoken. A bar chart is similar to the familiar time line in that it shows frames horizontally in a time sequence. By carefully listening to the song over and over in the sound editor panel, I was able to identify the frame at which each word is spoken. I make note of this on the bar chart so that later when I’m ready to animate the character’s mouth I’ll have it as a guide.


Bar Chart of Sound Snippet (click to enlarge)

I’m ready to start creating my character photo assets to animate. I found a great wacky ghoulish looking photo to be the head of my cartoon character. So I just need to import this photo into a drawing element using the “import and vectorize with texture” command.


Now that I have the photo imported into my drawing element, I’ll use the scissors tool to do a “rough” cut-out of the character’s head. I pull a bounding box around the desired picture area and drag it to separate it from the rest of the photo. Then using the drawing select tool, I select the unwanted part of the photo and delete it. Next I switch to the contour edit tool and begin the process of adding contour points to the outline of the head and dragging those contour points to define the head’s outline.


The ends of this character’s wild hair presents a bit of a challenge, so I zoom in and use the eraser tool to clean up the details of his hair. As you can see using the eraser should be limited to only when you need that level of fine detail as it produces a lot of vector points


Now I’m ready to create his mouth. There are many ways to approach this, but I’ll just show you a typical JibJab style of mouth. I use the scissors tool to select the part of the head that I want for his mouth and drag it off to the side. Then I will use the contour edit tool to add contour points and drag those points to reveal and detail his upper teeth. A really nice thing about the use of “vector boxes” for bit maps is that they essentially are like “masks” and when you pull down on those contour points where his teeth use to be before you cut them out as part of his mouth, you will find that the upper teeth are still there to be included in this part of his head.


I next will cut the drawing object for the mouth and copy it to a new drawing element. Once I do that, I’ll use the contour edit tool to add contour points and outline the lower teeth for his mouth.


So now I have the head as one element, and the lower mouth as a second element. I will go to the head element and in the void where I removed the lower mouth, I want to add a solid black shape which will act as the inside of his mouth when I move the lower mouth as he is singing. This is done by drawing a stroke line to close the space at his chin and using the paint tool to fill the zone created. Below are the head and lower mouth elements lined up in drawing view to show his naturally closed mouth.


Now to make him “talk” I will just keyframe his lower mouth element using the scene planning transform tool to open and close and position it as required by the song.


I spent some time looking for a good photo to use as his body and once I found one that looked promising I imported it into a drawing element using the “import and vectorize with texture” command just like I did with his head photo.


Then using the contour edit tool to first outline the main shape and then the cutter tool to cut-out his arms from that shape, I am preparing the characters body parts. I cut and paste the left arm to a new element and the right arm to a new element. And I also separate the lower part of the right arm and cut and paste it to its own element.


I also have to use the stroke tool and the paint tool to clean up the coat part of the body where his hands use to be. Now, I switch to camera view and using the scene planning select tool, I composite all these elements to produce a photo cut-out character and in the time line I set up his hierarchy.


I then use the scene planning rotation tool to position the pivot points for each of his body parts so that they will move naturally.


Lower right arm


Upper right arm


Left arm

Now I’m ready to create the character’s performance of the song.

I start by using the bar chart I created to determine at which frames he is speaking the words, and I carefully keyframe his mouth to match the sound track. This takes a number of passes to get the lip sync to where I like it. I want to get his mouth movements animated before I worry about his other gestures. Once I’m happy with the mouth movements I will work on his arm gestures. My goal is to keyframe his right and left arm to try to get some humor and personality into his performance. This is a lot of fun and the creative possibilities for the JibJab style of cartoons are quite significant. I added some background graphics and put an opening scene on the cartoon to set the mood.


Click this picture to view the final movie

I hope this tutorial gets you really motivated to try making a JibJab style cartoon of your own. They are very entertaining and fun to produce.

Labels:

Tuesday, September 11, 2007

Creating Multiple Shots In A Single Scene

This tutorial is focused on using Toon Boom Studio to make a cartoon short. It is intended to provide an overview of some of the steps in creating a one scene short that is composed of several view point changes more technically referred to as "shots".

Note: you can click on any image to view a larger version

In making this cartoon short, titled "A Matter of Artistic Differences", once the concept was determined and visualized in a rough storyboard, the first step was to create the sound track and the drawing elements. As you can see from the picture of the scene's exposure sheet in figure 2 below, there were 3 sound track elements and 26 drawing elements utilized. Now before you panic about the number of drawing elements used, only about 7 of these drawing elements contained more than one or two actual cells. Most are just occupied by a single drawing and only the main character elements have numerous drawings. The sound track was split up into three elements due to the need for overlapping of sounds in two places along the time line.

Note:
Normally we name elements as a single letter: a,b,c,d,e,.... and put the descriptions in element notes, but for this "how to" example we used more descriptive names for clarity.


Figure 1: the library view of "agile4" drawing element cells


Figure 2: the scene's exposure sheet

Although some of the picture composition was done using the "auto light table" to view cells across an exposure sheet frame, we normally do most picture composition in camera view. So we end up doing a great deal of the production work in the time line once the drawn cells are created. We try to avoid doing any drawing in camera view, all drawing is done in drawing view and camera view is where we composite the final scenes. As you can see by figure 3, the time line track list gets quite long. So we use peg elements like file folders to group and manage the clutter.


Figure 3: uncluttered track list with collapsed peg folders

As a note of interest, because we are using TBS V3.5 or higher, there are almost no separate peg elements being used which greatly reduces the number of time line tracks. Most of the separate pegs elements we used were as grouping devices like file folders just to be better organized. Most keyed frame work is done using animated drawing elements which now include their own integrated peg. Figure 4 below shows the expanded view of the track list.


Figure 4: the final expanded time line track list

This cartoon is shot as one actual scene. The opening sequence simulates the "on screen" presentation of our character Agile Ant as he is being blown about in a snow storm on a mountain top. When Agile yells "cut, cut, cut!" out of total frustration, we see via a "pull back and pan" of the camera, that this is in fact a movie set. Then as Agile begins his angry determined walk across the sound stage, we cut to a wide shot that reveals that this is a table top set much like one that would be used in a "stop frame" puppet cartoon like Wallace and Gromit. Figure 5 shows the camera's view point framing the opening shot.


Figure 5: the opening sequence shot

The second camera shot for our short is a "pull back and pan" reveal of the "real world" of the cartoon movie set. It is all done with the TBS camera. The initial art work was scaled only once as we set it up for the opening sequence. (see figure 8 below) The camera, which is attached to a peg element, is positioned to give us the tight shot of the mountain top with Agile blowing in the wind. Then when we are ready to make our pull back and pan move, we first set a key frame of the camera's attributes at time line frame 240. This is done to lock down the start of our camera for a motion tween. So having set the starting position of our camera move at frame 240, we move to the ending frame for this shot which we determined we wanted to be frame 356. With the transform scene planning tool selected, we move the red time line frame marker to frame 356 and use the up and down arrow keys and the left and right arrow keys of our keyboard to reposition the camera viewport to the desired ending position for our move. We also use the Top View panel to move the camera back away from the picture plane. This sets our ending keyed frame attributes. Now all that is needed is to go back to frame 240 on our camera peg and set the constant segment to non-constant and we have our camera move. We normally work with constant segments as a default setting and then we can switch the desired segment between key frames to non-constant as desired. We can adjust the velocity of the camera move using a customized function curve, but for this move we stayed with the default linear curve.


Figure 6: the time line at the beginning of the "Pull Back and Pan" shot


Figure 7: the time line at the end of the "Pull Back and Pan" shot


Figure 8: the relative size of the art work VS the camera viewport frame

Now comes a more complex shot sequence as we pick up Agile Ant in his determined walk across the set, first in a normal long shot, then in a really distant wide shot that reveals the true scope of our movie set and then in a closer tracking shot as he approaches the target of his wrath, that "prince" of a cartoon director, Marty.


Figure 9: the first shot of Agile walking

This shot sequence is made in three parts, but don't think of it as three separate sections of art work. It is one set of art work with three camera set ups. The actual character walking is a cycle that is key framed to move across the table top set. All the set and props have been scaled together as a composite picture and the character is scaled to match the same relative size as the props and set. The changes in viewpoint are all done with the camera set ups. So before we do the camera work we will animate Agile's entire walk across the whole set completely as if there were not going to be any changes in camera position. Once that's done it is all about using the TBS camera. For the first part of the sequence we position the camera viewport and create a motion tweened shot between frames 380 and 448. This is done in a similar manner to the way we did the pull back and pan including using the Top View panel to help us move the camera back farther from the picture plane.


Figure 10: the wide shot of Agile walking

At frame 449 we begin the wide shot part of the sequence (figure 10). The first thing we have to do at frame 449 is reposition the camera. We have the camera positioned at frame 448 with the ending keyframe of our prior move. So at 449 we completely reposition the camera using the Top View panel again to move the camera back from the picture plane to give us the complete view of the set. Once we get the right camera set up, we add a keyframe at frame 449 to lock down our starting camera position. This wide shot lasts until frame 552 where we have made a slight adjustment of the camera to give us a really small pan during our wide shot. The shot is created by key framing the camera start position at 449 then moving the camera at frame 552 and key framing that ending position and then creating a non-constant segment between 449 and 552. The walk and the art work are never changed.


Figure 11: back to the closer tracking shot of Agile walking

The last part of this sequence is the close tracking shot (figure 11). It starts at frame 553. So once again we need to start by making the beginning camera position for this shot and keyframe it at 553. The ending of the shot is at 777 with Agile right in front of Marty's face. Again we used the Top View panel to adjust our camera's distance from the picture plane to get the desired viewpoint. We haven't needed to use the Side View panel because although we are changing our cameras distance from the picture plane we are staying at the same horizontal eye level.


Figure 12: the last camera set up of this cartoon scene

At frame 780 we are ready for the final shot of the cartoon which is focused in on Agile as he delivers his frustrated speech to Marty. Figure 12 shows the camera viewport for this shot and the Top View panel where we are adjusting the distance between the camera and the picture plane.

As you hopefully are beginning to see, making a cartoon sequence in Toon Boom Studio is a combination of drawing and composition and cinematography. It is easy to design and produce multiple shots with in a single scene. It just takes a bit of planning up front.


Figure 13: cells from the "agile1" drawing element


Figure 14: cells from the "agile2" drawing element

I am always glad to answer questions about making cartoons and about using Toon Boom Studio and I actively frequent the TBS User Forums. -JK

Re-watch the cartoon : A Matter of Artistic Differences

Note: This blog post is an updated version of an article which I originally wrote and published as part of our web site's TBS FAQ section which we are slowly phasing out and replacing with this blog and the Cartooning in Toon Boom WIKI.

Labels: , ,

Sunday, September 9, 2007

Introduction To Photo Cut-Out Animation Part 2

Last time I imported a bit mapped graphic cartoon into a drawing element using the “import and vectorize” command “with texture” as the vectorization type. Next I copied the first cell and using the copy of that cell, I cut out the character of Friz Freleng. You can review the process by reading Part 1 of Introduction to Photo Cut-Out Animation.

So having prepared the Friz character, I need to do the same for the Pink Panther character. I go back to my original drawing and cut out the Panther. This time I used the cutter tool instead of the scissor tool. It’s a matter of personal preference so you can try either one. In either case I will want to use the contour edit tool to clean up and fine tune the cut out shapes. Here is the rough cut-out of the Panther


I’m going to cut the Panther into multiple body parts and put each part into a separate drawing element then I’ll rig the character in camera view on the timeline.


As I cut out the parts of the Panther, I also am using the contour editor, the eraser tool, the paint tool and the brush tool to fix up the parts so that the cut-out character can seamlessly be assembled and animated.


This is the torso with a modified scarf.


The head


The right arm


The left arm


The feet


And the tail

Here are the final composited characters in drawing view so now I’m ready to switch to camera view and start rigging them.


I’ll start out by adding a peg element for each character to act as the top level parent in their hierarchy. Then I’ll attach the body parts of each character to their top level parent peg. Next I’ll organize the body parts of the Panther character into two logical groups, one of the upper torso and one for the legs and tail.


I’m almost ready to begin keyframe animating but first I need to use the scene operations rotation tool to set the rotational pivot point for each body part and for the parent peg elements.


Friz's body rotational pivot point

Friz's arm rotational pivot point


Friz's parent peg rotational pivot point


The Panther's head rotational pivot point


The Panther's right arm rotational pivot point


The Panther's tail rotational pivot point


The Panther's left arm rotational pivot point


The Panther's torso rotational pivot point

With all the rotational pivot points set, I collapse my two top level parent pegs and using “extend children exposure” a new command that was added in TBS V 4.0, I extend my timeline out to 160 frames for each character parent peg and all its children.


The animating is just straight forward keyframing of the character’s body parts using the scene operations transform tool. I added a bit mapped background in an image element and added a fade to black transition at the end of the animation. If you are not familiar with keyframe animation, I suggest you review my previous series on Key Framed Animation.


Click here to view the final animation.


If you want to try it yourself, you can find the source cartoon graphic and the background graphic here. Stay tuned for more to come in future tutorials on Photo Cut-out Animation as well as other new features in Toon Boom Studio V4.0. Introduction To Photo Cut-Out Animation Part 3

Labels: