Jump Into Animation - Part 2
I set up a new animation project in Part 1. Then created a drawing element called "arc" and made a visual guide to follow while drawing this jumping action. Then I created another drawing element and roughed in the jump using a simple stick figure. Finally I created another drawing element and drew some solid volumes to act as a foundation for the character. So now I am creating another drawing element named "c" and I can actually start drawing a character using my rough guides.
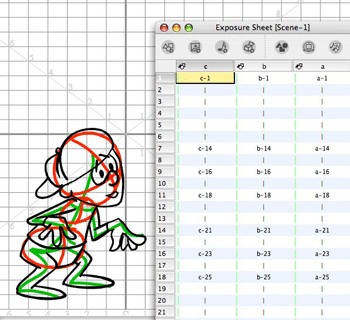
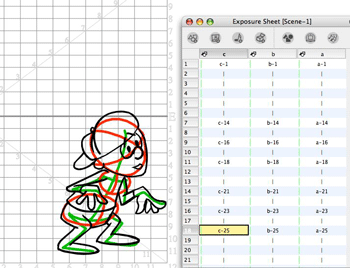
You might notice that my three drawing elements "a", "b", and "c" all have their cells visually identical, again this is not a rule, just a habit of mine. Animation projects are hard enough work, so with experience you will find your own little tricks to make your life easier.
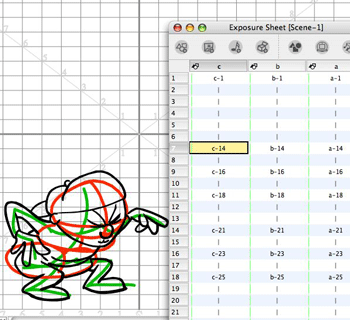
These are not meant to be finished inked drawings and if this were a real cartoon I would probably have done this layer in blue and created a clean up and inking layer called "d". One thing that I often find when working with people doing computer animation directly in digital (not scanned) is that they almost always want to rush to the painting phase while animating. I call it the rush to the finish line. Again, different methods exist and there are no rules set in concrete, but "filling" in paint zones before the animation is totally worked out and satisfactory, just makes your life harder. Seeing a more finished looking character may be gratifying but it is best to wait on the painting.
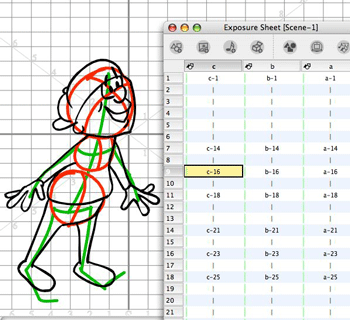
Also as temping as it might be to really want to polish your drawings, you want to work out the action first and then you can polish away on a new layer. In fact, when you are first starting out, it is much more important to do a lot of "rough" animations instead of only doing a few really finished pieces. It is tough to resist the urge to polish and detail your exercises but you will progress faster if you draw more. There will be plenty of time to polish later.
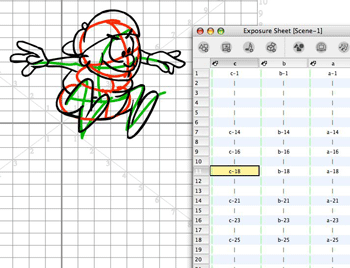
As you get to the stages where your construction elements are no longer needed, don't delete them just un-check them in the X-sheet and in the timeline. You might want to reuse them at some later time during your project and they really don't impact much except taking up some hard drive space. They won't show in or add to the size of your rendered work.
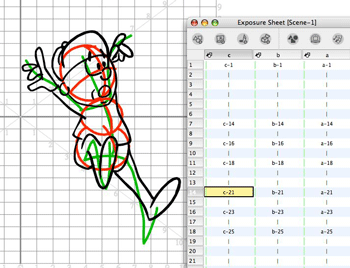
I hope that this tutorial is easy to follow, but if you have questions be sure to ask for clarification.
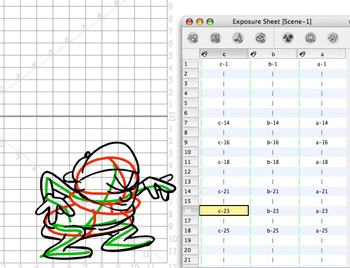
We are almost finished and this is only about a second of screen time and not inbetweened. Now you know why limited animation replaced full animation on TV in the 1960's.
Here is a Camera and Timeline view of our little jumper. You will notice that we aren't spending much time on the camera or the timeline here because this is a character action and we aren't worrying about compositing it into a scene yet. Also because this isn't cutout animation I don't need keyframed parameters at this stage.
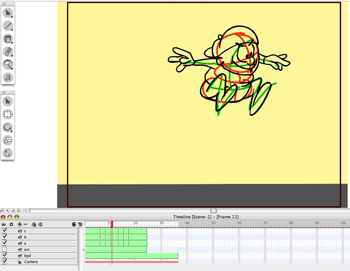
You can see the animation of the character added to the construction here.
That's all for now.

You might notice that my three drawing elements "a", "b", and "c" all have their cells visually identical, again this is not a rule, just a habit of mine. Animation projects are hard enough work, so with experience you will find your own little tricks to make your life easier.

These are not meant to be finished inked drawings and if this were a real cartoon I would probably have done this layer in blue and created a clean up and inking layer called "d". One thing that I often find when working with people doing computer animation directly in digital (not scanned) is that they almost always want to rush to the painting phase while animating. I call it the rush to the finish line. Again, different methods exist and there are no rules set in concrete, but "filling" in paint zones before the animation is totally worked out and satisfactory, just makes your life harder. Seeing a more finished looking character may be gratifying but it is best to wait on the painting.

Also as temping as it might be to really want to polish your drawings, you want to work out the action first and then you can polish away on a new layer. In fact, when you are first starting out, it is much more important to do a lot of "rough" animations instead of only doing a few really finished pieces. It is tough to resist the urge to polish and detail your exercises but you will progress faster if you draw more. There will be plenty of time to polish later.

As you get to the stages where your construction elements are no longer needed, don't delete them just un-check them in the X-sheet and in the timeline. You might want to reuse them at some later time during your project and they really don't impact much except taking up some hard drive space. They won't show in or add to the size of your rendered work.

I hope that this tutorial is easy to follow, but if you have questions be sure to ask for clarification.

We are almost finished and this is only about a second of screen time and not inbetweened. Now you know why limited animation replaced full animation on TV in the 1960's.

Here is a Camera and Timeline view of our little jumper. You will notice that we aren't spending much time on the camera or the timeline here because this is a character action and we aren't worrying about compositing it into a scene yet. Also because this isn't cutout animation I don't need keyframed parameters at this stage.

You can see the animation of the character added to the construction here.
That's all for now.
Labels: Tutorial


3 Comments:
Very informative post, JK. "fleshing out" my drawings is something I've been working on, & something many people (self included) don't do. I catch myself often trying to draw a perfect picture in one fell swoop, & it just doesn't happen that way. Especially at my skill level. I get much better results when I take the time to start with a few lines & then give em some meat as everything begins to take shape.
hi, this really helped me drive home a lesson i am giving, thanks.
I recently purchased Toon Boom Animate. This was very helpful!!!
Thank you very much!!!!
Post a Comment
<< Home