Creating Multiple Shots In A Single Scene
Note: you can click on any image to view a larger version
In making this cartoon short, titled "A Matter of Artistic Differences", once the concept was determined and visualized in a rough storyboard, the first step was to create the sound track and the drawing elements. As you can see from the picture of the scene's exposure sheet in figure 2 below, there were 3 sound track elements and 26 drawing elements utilized. Now before you panic about the number of drawing elements used, only about 7 of these drawing elements contained more than one or two actual cells. Most are just occupied by a single drawing and only the main character elements have numerous drawings. The sound track was split up into three elements due to the need for overlapping of sounds in two places along the time line.
Note: Normally we name elements as a single letter: a,b,c,d,e,.... and put the descriptions in element notes, but for this "how to" example we used more descriptive names for clarity.
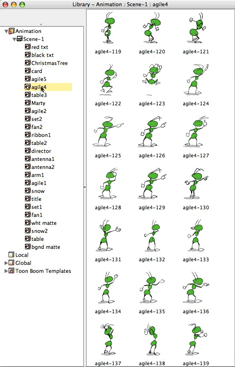
Figure 1: the library view of "agile4" drawing element cells
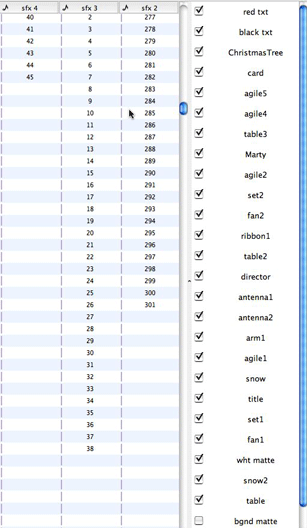
Figure 2: the scene's exposure sheet
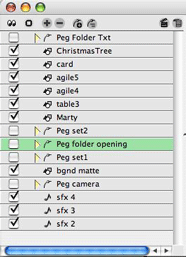
Although some of the picture composition was done using the "auto light table" to view cells across an exposure sheet frame, we normally do most picture composition in camera view. So we end up doing a great deal of the production work in the time line once the drawn cells are created. We try to avoid doing any drawing in camera view, all drawing is done in drawing view and camera view is where we composite the final scenes. As you can see by figure 3, the time line track list gets quite long. So we use peg elements like file folders to group and manage the clutter.
As a note of interest, because we are using TBS V3.5 or higher, there are almost no separate peg elements being used which greatly reduces the number of time line tracks. Most of the separate pegs elements we used were as grouping devices like file folders just to be better organized. Most keyed frame work is done using animated drawing elements which now include their own integrated peg. Figure 4 below shows the expanded view of the track list.
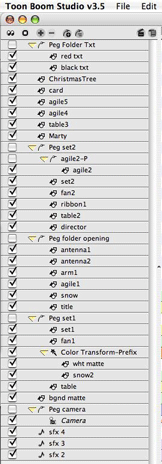
Figure 4: the final expanded time line track list
This cartoon is shot as one actual scene. The opening sequence simulates the "on screen" presentation of our character Agile Ant as he is being blown about in a snow storm on a mountain top. When Agile yells "cut, cut, cut!" out of total frustration, we see via a "pull back and pan" of the camera, that this is in fact a movie set. Then as Agile begins his angry determined walk across the sound stage, we cut to a wide shot that reveals that this is a table top set much like one that would be used in a "stop frame" puppet cartoon like Wallace and Gromit. Figure 5 shows the camera's view point framing the opening shot.
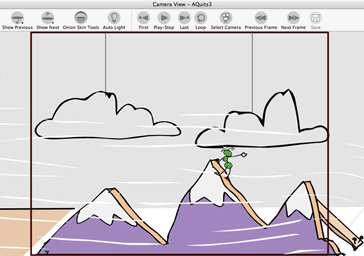
Figure 5: the opening sequence shot
The second camera shot for our short is a "pull back and pan" reveal of the "real world" of the cartoon movie set. It is all done with the TBS camera. The initial art work was scaled only once as we set it up for the opening sequence. (see figure 8 below) The camera, which is attached to a peg element, is positioned to give us the tight shot of the mountain top with Agile blowing in the wind. Then when we are ready to make our pull back and pan move, we first set a key frame of the camera's attributes at time line frame 240. This is done to lock down the start of our camera for a motion tween. So having set the starting position of our camera move at frame 240, we move to the ending frame for this shot which we determined we wanted to be frame 356. With the transform scene planning tool selected, we move the red time line frame marker to frame 356 and use the up and down arrow keys and the left and right arrow keys of our keyboard to reposition the camera viewport to the desired ending position for our move. We also use the Top View panel to move the camera back away from the picture plane. This sets our ending keyed frame attributes. Now all that is needed is to go back to frame 240 on our camera peg and set the constant segment to non-constant and we have our camera move. We normally work with constant segments as a default setting and then we can switch the desired segment between key frames to non-constant as desired. We can adjust the velocity of the camera move using a customized function curve, but for this move we stayed with the default linear curve.
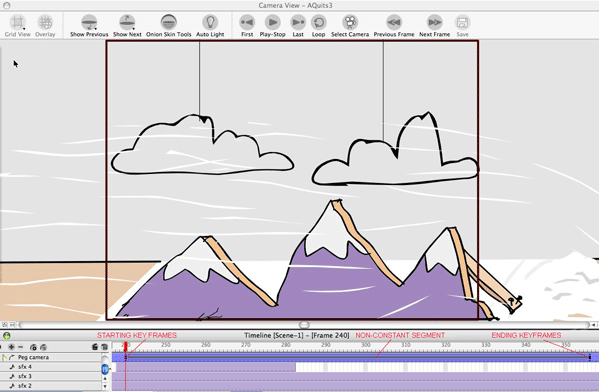
Figure 6: the time line at the beginning of the "Pull Back and Pan" shot
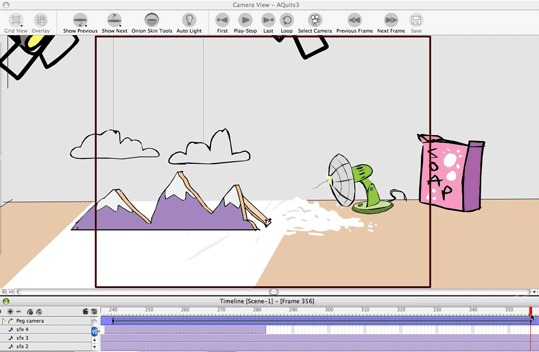
Figure 7: the time line at the end of the "Pull Back and Pan" shot
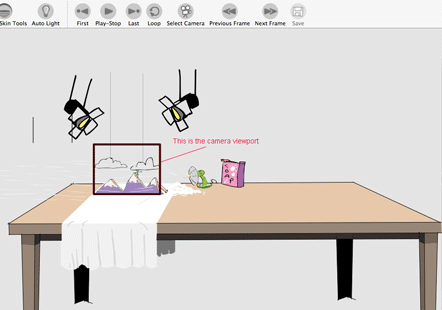
Figure 8: the relative size of the art work VS the camera viewport frame
Now comes a more complex shot sequence as we pick up Agile Ant in his determined walk across the set, first in a normal long shot, then in a really distant wide shot that reveals the true scope of our movie set and then in a closer tracking shot as he approaches the target of his wrath, that "prince" of a cartoon director, Marty.
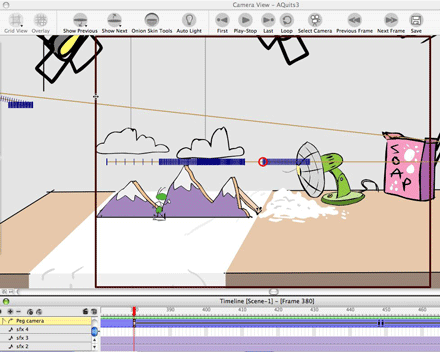
Figure 9: the first shot of Agile walking
This shot sequence is made in three parts, but don't think of it as three separate sections of art work. It is one set of art work with three camera set ups. The actual character walking is a cycle that is key framed to move across the table top set. All the set and props have been scaled together as a composite picture and the character is scaled to match the same relative size as the props and set. The changes in viewpoint are all done with the camera set ups. So before we do the camera work we will animate Agile's entire walk across the whole set completely as if there were not going to be any changes in camera position. Once that's done it is all about using the TBS camera. For the first part of the sequence we position the camera viewport and create a motion tweened shot between frames 380 and 448. This is done in a similar manner to the way we did the pull back and pan including using the Top View panel to help us move the camera back farther from the picture plane.
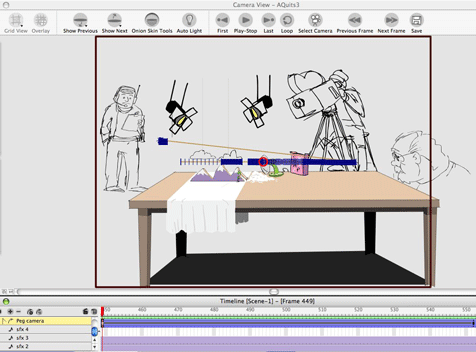
Figure 10: the wide shot of Agile walking
At frame 449 we begin the wide shot part of the sequence (figure 10). The first thing we have to do at frame 449 is reposition the camera. We have the camera positioned at frame 448 with the ending keyframe of our prior move. So at 449 we completely reposition the camera using the Top View panel again to move the camera back from the picture plane to give us the complete view of the set. Once we get the right camera set up, we add a keyframe at frame 449 to lock down our starting camera position. This wide shot lasts until frame 552 where we have made a slight adjustment of the camera to give us a really small pan during our wide shot. The shot is created by key framing the camera start position at 449 then moving the camera at frame 552 and key framing that ending position and then creating a non-constant segment between 449 and 552. The walk and the art work are never changed.
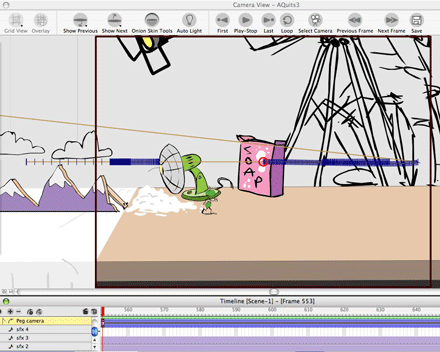
Figure 11: back to the closer tracking shot of Agile walking
The last part of this sequence is the close tracking shot (figure 11). It starts at frame 553. So once again we need to start by making the beginning camera position for this shot and keyframe it at 553. The ending of the shot is at 777 with Agile right in front of Marty's face. Again we used the Top View panel to adjust our camera's distance from the picture plane to get the desired viewpoint. We haven't needed to use the Side View panel because although we are changing our cameras distance from the picture plane we are staying at the same horizontal eye level.
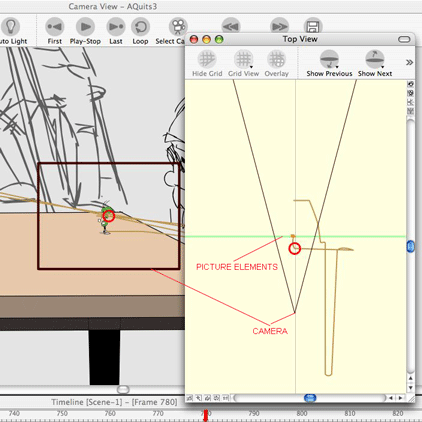
Figure 12: the last camera set up of this cartoon scene
At frame 780 we are ready for the final shot of the cartoon which is focused in on Agile as he delivers his frustrated speech to Marty. Figure 12 shows the camera viewport for this shot and the Top View panel where we are adjusting the distance between the camera and the picture plane.
As you hopefully are beginning to see, making a cartoon sequence in Toon Boom Studio is a combination of drawing and composition and cinematography. It is easy to design and produce multiple shots with in a single scene. It just takes a bit of planning up front.
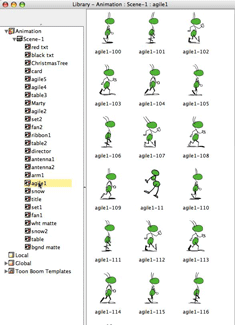
Figure 13: cells from the "agile1" drawing element
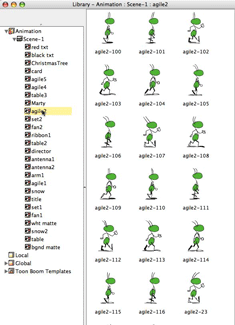
Figure 14: cells from the "agile2" drawing element
I am always glad to answer questions about making cartoons and about using Toon Boom Studio and I actively frequent the TBS User Forums. -JK
Note: This blog post is an updated version of an article which I originally wrote and published as part of our web site's TBS FAQ section which we are slowly phasing out and replacing with this blog and the Cartooning in Toon Boom WIKI.
Labels: Key Framing, Scene Planning Tools, Tutorial


5 Comments:
Thanks for the tutorial. I'm trying to teach myself this software but it is proving to be difficult. i want to jumkp right to my own animation but i should probably master the program first. i would like to but toonbooms tutorials but as this is more of a hobby i dont want to go broke learning it. -- jose
pauliesbparty@gmail.com
Jerry, the animation of "Artistic Differences" was great!
Barb
Jerry, I just viewed the animation titled something like "Artistic Differences" a Christmas animation. I got a real laugh out of it. Thanks.
Barb
Hi Jerry.
I'm a TB novice, and I'm troubled with a camera movement. I read this detailed tutorial ( and put the blog in my bookmarks, looks VERY useful ), but I didn't get a solution :(
The problem is : I don't know how to make a simple ( at least, I see it as "simple" ) camera zoom on a detail of a drawing ( a drawing 'exposed' for 15 frames )...if I move the camera ( in the camera line ) to the desired spot, the framing applies to the whole drawing from the beginning, in other words the landscape ( it's a landscape ) is cut from the beginning of the sequence, while at the start I'd like to show the whole scene, then gradually move the camera to the right.
Hope to have explained the problem/doubt enough clearly, english being not my language.
My TB version is 3.5.
Any suggestion is welcome...
In a camera move you have a starting position and an ending position. You have one field of vision at the start and a different field of vision at the end. So there has to be a way to "lock" down the camera at the beginning of the shot and also at the end of the shot. The frames in between will thus be defined by your method of interpolation between the two ends. The answer is you use key frames. You position your camera at your desired location and field of vision at the start frame and set a key frame on the camera's peg to lock down that position. Then you move to the last frame of the shot and reposition the camera and its field of vision for how you want the shot to end and set a key frame on the camera's peg at that last frame to lock down the end of the shot. Then you set the frames from the start of the shot to the end of the shot on the camera's peg to be a non-constant segment. How those in betweens are created is controlled by the function curve you select or by the default function curve in TBS which is just an equal change per frame.
Post a Comment
<< Home