Key Framed Animation Part 4
Please be sure to review
before you continue with these next parts of this series.
In Part 3 of this series we viewed an Example Scene and began discussing the steps to creating that scene. We saw the use of the scene planning select tool in the assembly of the underwater background environment. The scene planning select tool is used to place elements into the scene initially. We reviewed some examples and discussed reasons for being careful not to use the select tool after you start key frame animation of an element or element hierarchy.
Now that we have assembled the background environment for this scene we are ready to start the character animation. The scene’s storyline calls for Filbert, a fish, to swim into the scene from off camera and to slowly swim to about the middle of the scene where he will react to meeting a ferocious shark. To accomplish this we will need a swimming cycle that will be repeated for some period of time as well as a motion path to move Filbert along as he swims.
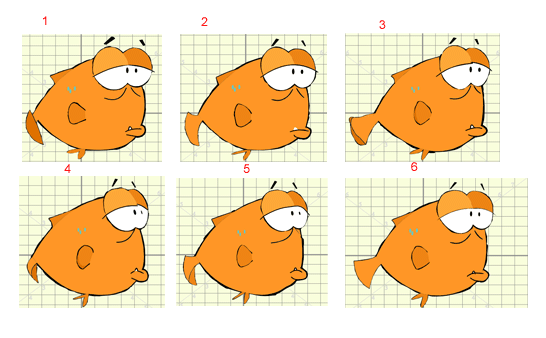
Fig 1. The 6 keys for the swim cycle (click to enlarge)
I animated the swimming cycle through drawn images. The cycle uses only six unique images spaced on 2’s, which means one new image every other frame. A complete cycle is 12 frames in length. I constructed Filbert swimming using 7 individual elements or layers. I could easily have done it by just drawing the six key drawings on six cells of a single layer. I chose to use 7 elements to show the composite of multiple layers to create a character. But it was totally an arbitrary choice for demonstration purposes.
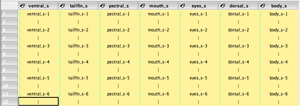
Fig 2. The 7 element parts of Filbert in the Exposure Sheet
Once the swim cycle is created, I have to look at the storyboard and the director’s notes to learn the duration of the swimming prior to Filbert reacting to meeting the shark. This way I will know how many exposures I will need of Filbert swimming for my exposure sheet. It turns out that he is supposed to swim for 30 seconds of screen time and then react. At 24 frames per second (FPS) 30 seconds is equal to 720 frames. So if Filbert’s swim cycle is 12 frames long then there will be 60 swim cycles in the scene up to the point of the reaction. (720 divided by 12) To fill out my exposure sheet I can create 60 cycles out of each of Filbert’s component elements. To do this I select an element and select the 12 frames of the swim cycle. By right clicking I open the context menu and can select “create cycle”.
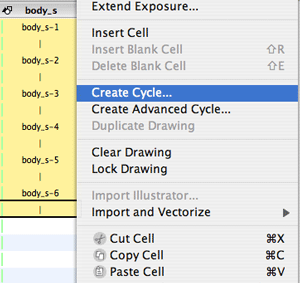
Fig. 3 Using the Create Cycle menu command
A dialog box opens and I enter 60 for the number of cycles. (The original cycle is included in the total cycle count) When I click on OK the exposure sheet is populated by repeating cycles of cells all the way to frame 720 as expected. I need to repeat this for all 7 of Filbert’s elements. There are other ways that I could have done this as we will see later in this scene.
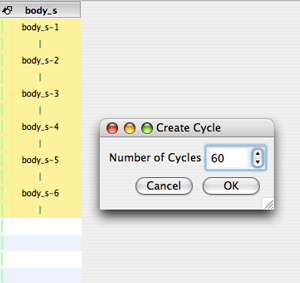
Fig 4. Entering the number of cycles you want to create
Now that I have Filbert swimming for 30 seconds on the exposure sheet I still need to place him in the scene and then have him do more than just splash about. He needs to get moving. I switch to camera view and there is Filbert but he is too big and facing in the wrong direction. So using the scene planning select tool and the drawing tab of the properties panel, I reduce him in size and change his orientation. I want to scale him down to 50% of his actual drawn size so I check the “keep proportions” box and set his scale value text box to 0.5. I also want to flip him horizontally. I could do this by entering 180 in the skewing and rotation text boxes or I can use the select tool transform outline that is around Filbert. By dragging the right middle grab handle horizontally across Filbert’s body I can cause him to flip horizontally.
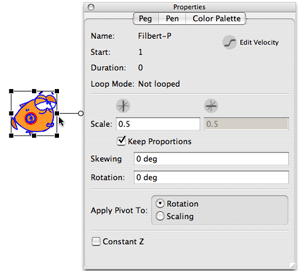
Fig 5. Initializing Filbert in the scene and flipping him horizontally
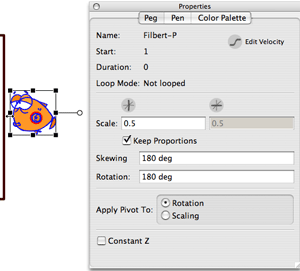
Fig 6. Completing the horizontal drag of the handle to flip Filbert
I also need to adjust Filbert’s 3D space location using the side view and top view panels to place him appropriately in relationship to the various underwater scenery props.
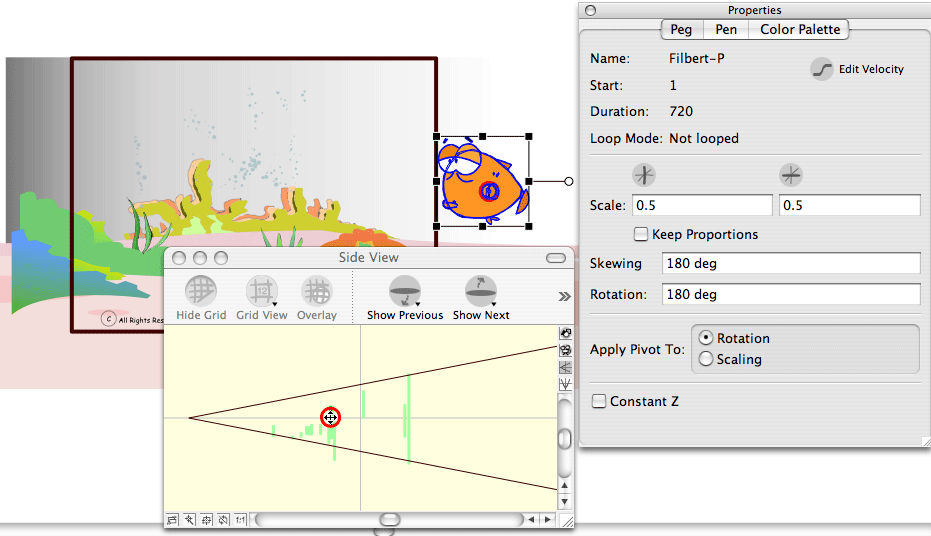
Fig 7. Adjusting Filbert's location in 3D space in the Side View panel (click to enlarge)
There is one more step that I like to take and that is to initialize the character’s position on the character peg. I have all of Filbert’s element parts attached to a common parent peg, Filbert-P, which I refer to as his character peg. This peg, in the case of this instance of Filbert swimming, is just being used as a grouping peg and not for animation, because I already drew the swimming animation, but I will still add initializing and ending keyframes to the peg just to insure that the values are set and not left to chance.
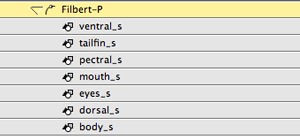
Fig 8. The Filbert swim action element hierarchy
To do this I first collapse the character peg, this insures that all settings to the parent peg are reflected in the attached elements below. Then I make the scene planning transform tool active (selected). I go to the first frame of the Filbert-P character peg and I add a keyframe. Actually it is a group of keyframe types because remember this is being addressed by the transform tool. I then go to frame 720 the end of this peg and add an ending keyframe group. Did I have to do this considering I’m not keyframe animating on this peg? No, but it is a good habit.
The animation of the motion associated with Filbert’s swimming is done on a motion guide peg which is separate from his character peg. This approach is a good practice because as I reuse the Filbert character swimming he will swim the same but follow different paths as required. I created a new parent peg and named it “Swimming”. Then I attached the collapsed Filbert-P peg to the “Swimming” peg. Now I can create my swimming motion path.

Fig 9. Adding the Swimming peg as a motion path
I begin by collapsing the “Swimming” peg and making the scene planning motion tool active (selected). Then I move the red frame slider to frame one and select the first frame of the “Swimming” peg. I add a motion keyframe. Next I move to frame 670 on the “Swimming” peg which is where Filbert begins to tread water prior to reacting to the shark. I add a second motion keyframe there. Then in the camera view window I grab the end of the motion track and move it until Filbert is positioned in the middle of the scene. You can tell which end to grab by the direction of the reddish brown motion arrows. Think of the motion path as a double ended arrow with each end pointing outward.
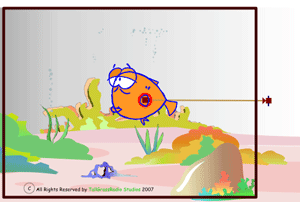
Fig 10. Stretching the motion path to position Filbert mid-scene
Once the path is stretched out all I need to do is go back to frame one on the “Swimming” peg and set the motion segment between the two motion keys to non-constant. I’m happy with the default linear velocity curve for my spacing.
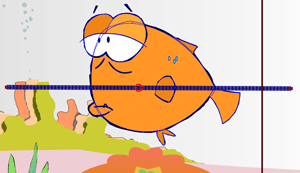
Fig 11. Filbert swimming down the motion path on the Swimming peg
This is a simple motion path just a straight line but in future articles we will see how to fashion more complex paths. That's it, we now have Filbert swimming into the scene and out to the middle of the camera’s view window.
Next time in Part 5 we will continue by animating Filbert’s reaction and adding some camera work to accentuate the shocking effect. If you have questions, you can write them as blog comments here or you can post them in the Q&A for the Cartooning In Toon Boom blog thread in the Tutorials section of the Toon Boom Studio User Forums.
Labels: Fundamentals, Key Framed Animation, Key Framing, Pegs, Scene Planning Tools


3 Comments:
I have sent a request to the Toon Boom forum, asking if I can see the two videos on rigging cut-outs. Now I have found you'r site I am now hoping to get to learn more.
I cant express how thankfull I am to have found your site. I have recently purchased the Studio 4 and am hoping to graduate(by my own standards) end of this year. Please keep up the good work.
This site is a great tool for ToonBoom users. Learning new tricks everyday, from the same articles. As a newbie to this software it's a plus for me, even right from Kenya.Please write more on motion paths and scene management. Kudos.
Post a Comment
<< Home