Introduction To Photo Cut-Out Animation Part 1
One of the new features of Toon Boom Studio V 4.0 is a deceptively innocent change to “import and vectorize”. It is an added vectorization type “with texture”. This opens the doorway to many potentially new and creative ways to use TBS, the most significant of which is “photo cut-out animation”. Toon Boom already had excellent support for cut-out animation and this new feature really adds many interesting possibilities. In this tutorial series I am going to begin to show you some of the conceptual ways to use this new feature for doing photo cut out animation.
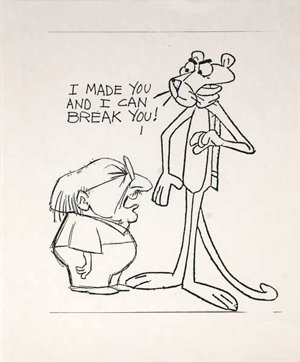
Friz Freleng and the Pink Panther Cartoon
I wanted to keep this tutorial simple, so I chose a cartoon graphic that just screamed out to me to bring it to life in an animation. It is a drawing of the great animation director Friz Freleng and one of his most famous stars the Pink Panther. I am unfortunately not able to credit the artist of this cartoon drawing, but it is so full of character and implied action that it just seemed totally appropriate for use in this tutorial.
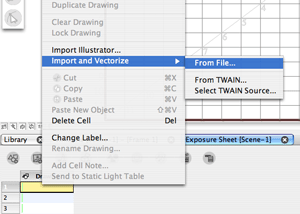
The first step in constructing this animation project is importing the source cartoon to a drawing element using the “import and vectorize” command. We go to the exposure sheet and start on the first cell of a drawing element. With the right mouse button we click to open a context menu to access the "import and vectorize" command. This opens a dialog box where we select the source drawing and set the vectorization type to “with texture”. (see the red arrow in the figure below) This will import the cartoon drawing into our drawing element cell in what is described as a “vector manipulation box”. This “vector manipulation box” is the secret of how we are going to turn a bit mapped graphic into multiple vector animation assets in separate drawing elements.
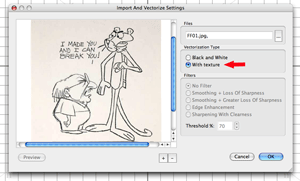
Click to see an enlarged version of this figure
With the bit mapped graphic imported into our drawing element cell, we can begin the character cut-out process. There are many ways to approach this so I’m going to show you the way that I used to cut-out the Friz and Panther characters. I started out making a copy of my drawing element’s first cell. That way I don’t have to worry about destroying other parts of the vectorized drawing that I will want to use later. I start working on the copy of my first cell and begin with the scissor tool. I pulled a bounding box around the Friz character and then by dragging the bounding box to one side the Friz character is separated from the rest of the cartoon drawing.
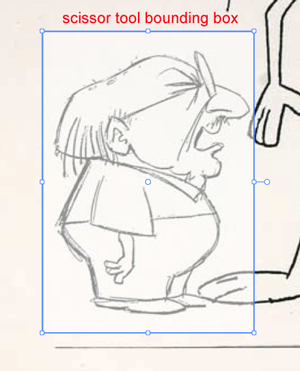
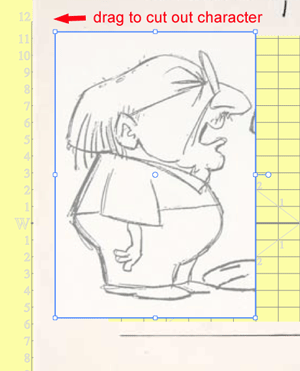
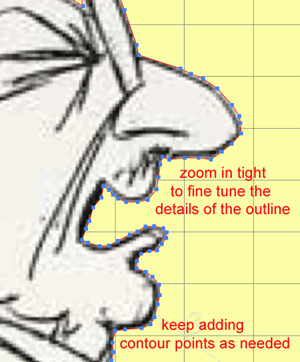
I now can select and delete the rest of this copy of the drawing leaving me with just the Friz character. My next step is to begin the clean up of this initial cut out, so I am going to use the contour edit tool to adjust this "vector box" shape. I begin by adding additional contour points to the outline which I am going to then drag to define my desired character’s shape. To add a contour point you hold down the CTRL key while clicking on the outline. (the Option/ALT key on the Mac)
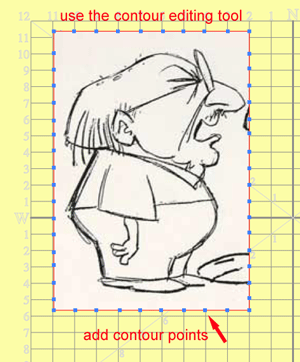
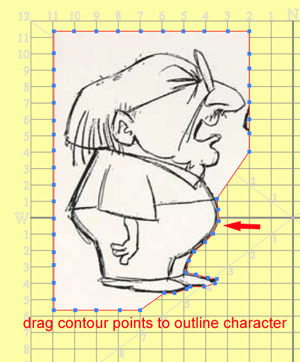
It is a process of dragging and adjusting the outline contours, first roughly, and then zooming in and fine tuning the outline adding more contour points as I go as needed. If you are not familiar with contour editing it may take you some practice to learn when and how to use the point control handles and how to adjust the contours. But, it’s actually fun.
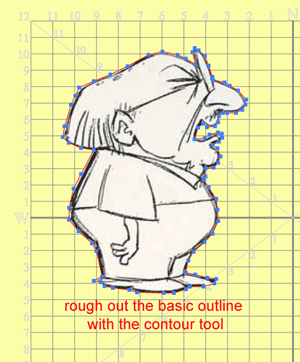
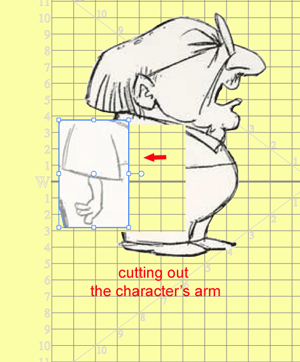
Next I’m going to make a copy of this drawing to use to cut out Friz’s arm and I’ll delete the unwanted parts of that copy just leaving the arm cut out.
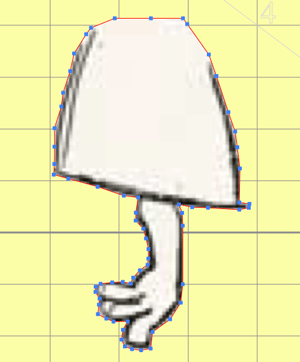
And then using the contour editing tool and adding and adjusting contour points I’ll define the shape of his arm just like I did for the main character drawing.
Now I’ll go back to my previous drawing of Friz and using the eraser tool I’ll remove the lines of his arm. I purposely have a yellow background for my drawing view panel so it is easy to see what is drawing and what isn’t.
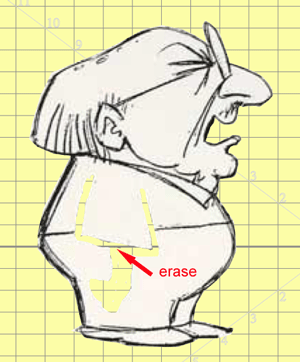
Having erased some of the drawing, I now need to use the paint tool and the brush tool to fix up the drawing. Yes, that’s right. The bit mapped image is inside a "vector box" so I can draw and paint on it just like any other vector drawing. I’ll create some color swatches to match the colors in the image so that my edits aren’t too noticeable from the original.
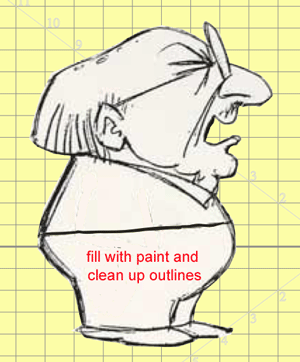
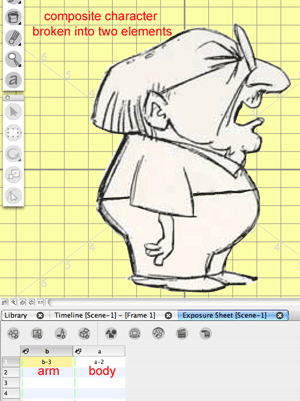
My next step in creating the Friz character is to separate the body drawing and the arm drawing on to separate drawing elements that I can composite into a cut-out for animating. It is simply a matter of copying drawing objects and pasting drawing objects from one element to two separate elements. My initial drawing element is just being used as a scratch work element and will not be used in the final animation. So I've created an element "a" for Friz's body and an element "b" for Friz's arm.
I want to have Friz yelling at the Panther as I envisioned he was doing in the original source cartoon image, so I need to make a second mouth position. I will do this by making a copy of the body cell in element “a” of Friz with his big mouth wide open. Then using the eraser tool, the paint tool, and the brush tool I’ll close his mouth on the copy drawing. Now when I alternate between these two element "a" cells, Friz’s mouth opens and closes and can be animated to match his speaking.
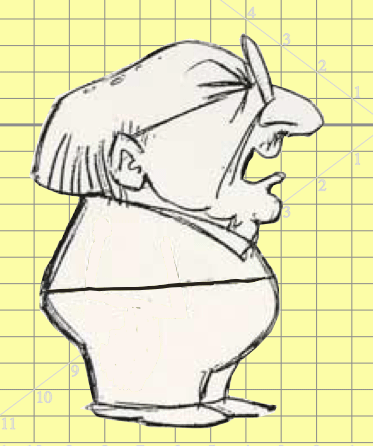
Cell a-2
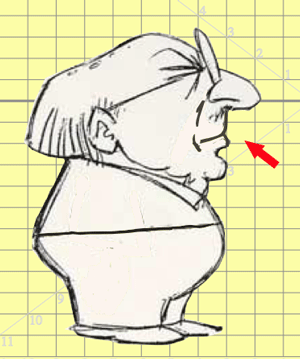
Cell a-4
The Friz character is now ready to rig and animate in camera view on the timeline. Next time, in part 2, I’ll cut out the Pink Panther character, rig both characters and create the actual animation.
Labels: Tutorial


15 Comments:
Great tutorial.
I'm just confused over one part. I have all of my parts in separate element columns (arms, etc), and secondary versions of them in the same columns, in a lower cell (bent arms, etc).
What I'm confused about it how to see them as one composite view. I still have the complete version of them, but am I also supposed to have a view of them in another way? Or am I just interpreting this wrong?
Zac,
There are two ways to view your composite character. In drawing view you can press the keyboard shortcut key L to turn on the autolight table that will show you all elements. Or you can switch to camera view to see the composite of all your elements. You will want to hide the element that has all the parts as that one isn't needed. To do that you uncheck the element's track in the timeline and then in the exposure sheet you will uncheck the element in the element list that can be viewed on the far right of the exposure sheet.
Awesome! Thanks for the quick reply.
Hey,
First of all thanks for this an all the other tutorials. quick question: Is there somekind of colorpicking tool inside Toon Boom studio 4? I'm trying to get the closed mouth good, but am always stumbling on the colors.
Kind regards
There are two types of color selection tools available in TBS.
The first one is on the drawing tools palette and looks like an eye dropper and is used to switch colors by selecting an existing paint zone color on your art work and causing the matching swatch and color management pallete to be selected as the active color.
The other color selector tool is on the color editing panel that opens when you double click on a color swatch in one of your color palletes. You can use that color selection tool to select any color from your display screen even outside of TBS and that color will be placed on the currently active color swatch.
So one tool is to locate a color swatch that already exists quickly. And the other selection tool is to load a color onto a swatch for future use.
Thanks!
I don't understand where he copies the cell he intends to work on to. Does he copy it into the next cell in the exposure sheet or does he copy it into the timeline after he has added a new element?
If I copy it on the exposure sheet into the next cell and start working on it, the original cell changes too. So, what is the purpose of copying?
Otherwise the tutorial is good, how he describes the use of the tools, etc, but it isn't at all clear with the copying.
Michelle
The original drawing is imported into a drawing element. Then I use new different drawing elements for each body part which I want to use for my animation work. Eventually I hide the original element containing the imported art work as it was just a storage place for me to revert back to if I messed up some part of one of my copies. I hope that clears things up for you.
Thank you JK. Now I have another problem. I imported my original, made some of the body parts I needed. However, because of my changes that I made, I need to replace the same colour, into my drawing, which was taken out when I made the (in this case) the arm part. Since the Import was a vector, I change to the default colour palette, however, when I want to use the dropper to match the colour - because none of the default colour palette matched the colour I needed - it jumped back to vector.
Then, I thought, ok, the colour dropper doesn't work, so I exported the body where I took the arm from into my Adobe program. There I was able to match the colour and the picture looked great, but then, when I imported it back into the TBS, it was larger. When I zoomed it out, all the other body parts zoomed out also, even though they were smaller than the re-imported picture.
I have never had a program, where I encountered so many problems with. I assume, you are already an expert with TBS - do you think it is a good program, or did I make a mistake buying it.
I have made very good cartoons with the Adobe program, which was a long process, but considering the time I wasted with the TBS already, I am starting to wonder.
Michelle
To do color sampling to capture a specific color you don't use the dropper tool from the drawing palette. That dropper tool is used to help you to quickly find an existing swatch on an existing TBS color pallete. Instead you need to add a new swatch to your color palette and double click on the new swatch to open the color editor. Then use the dropper tool that is part of the color editor to sample and capture any color that is showing on your computer's display. The color editor dropper tool is different from the drawing tools dropper.
As to your question about choices of software. It is a personal preference. Learning any new application takes time and the more powerful the application the more time it takes. I use both TBS and Flash and I prefer TBS for animation work. But there is a learning curve which is why I try to help new users to learn TBS through these tutorials.
Thank you JK. At least with your help I have made progress.
Now I will just have to figure out how to resize images and vector pictures. Then I will be probably on my way starting to accomplish something.
Again, thank you for your help.
Michelle
Amazing work you have put down here and it is really to a great help - and also thanks again for the e-mail responses! I finally managed to get some animation going:)
But I have to join in with Michelle here - I have never encountered an application which has been giving me such a lot of headache! Having cleared a couple of the obstacles, I already begin to see how it could be made more intuitive. Perhaps I should write them a few suggestions.
But I will be coming back to these pages. They should pay you for these:)
First of All Thank you for your awesome Post!! Amazing work done put down by you here gives a brief idea how to create using Toon Boom. Great!!
Thank you for this tutorial! I'm trying to find out when doing cutout animation how you can make your pegs rotate. For example, I can rotate an image on the whole, but the only thing I know how to do with pegs is move up, down, left, right, or forwards or backwards, which doesn't help when I want to move an arm... Is there a trick to moving by angle with a peg?
I believe that this tutorial might help you with understanding how to get started animating your cut out character.
Animating Cut Outs
Post a Comment
<< Home